Alarm Management
In this section, you will see pictures and brief explanations of how to handle the alarms.

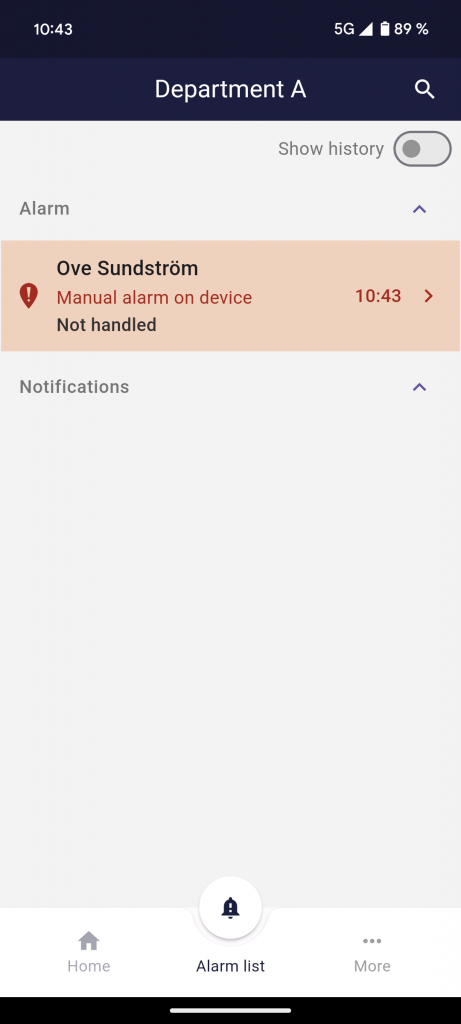
1. When an alarm has been received, you will find it in the alarm list. To manage the alarm press ‘Handle’.

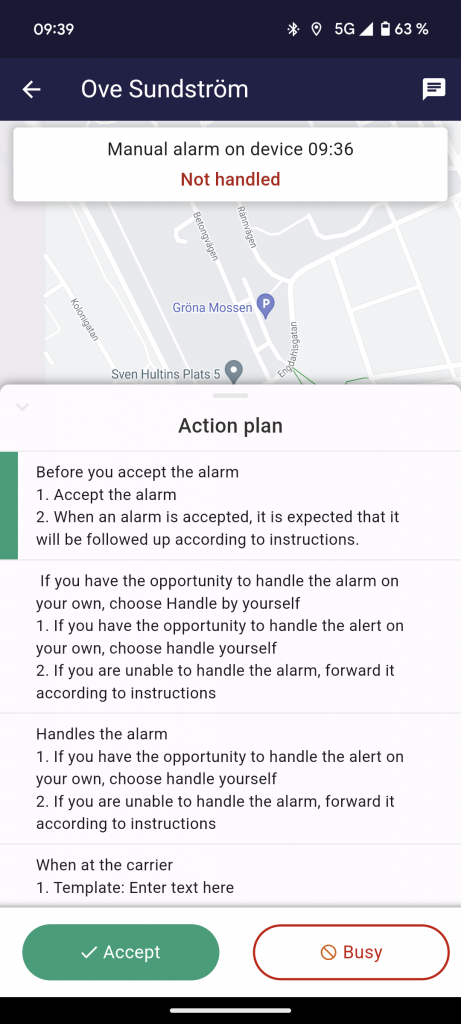
2. On the map, you can see the carrier’s position illustrated with a black positioning drop and the dashed line shows older positions to give an idea of where the user is going. If you want to retrieve the longitude and latitude or street address where the carrier is, press the black positioning drop.
On the right-hand side of the screen, you can read the action plan developed for this carrier and alarm type, as well as the device’s status in the form of battery level and last received message. If you want to handle the alarm press ‘Accept’.

3. If you want to handle the alarm yourself, press ‘Handle alone’ and if you have the forwarding function active, you can also forward the alarm to another alarm receiver.

4. You can register that you are with the carrier in this mode but also call for help from another alarm receiver if you need it by pressing ‘Forward’ if you have that function active or end the alarm if the alarm event has been resolved.
Alarm Managemant
To handle an alarm, click on “Alarm list” in the menu bar at the bottom of your screen. Then click on the name of the user whose alarm you want to handle. Alarms can have different colors. Red means that the alarm is unhandled, while yellow means that someone is handling the noise.

The user’s position is illustrated with a black position symbol (drop). The dashed line shows older positions to give an understanding of where the user is moving.
If you want to find the longitude and latitude or street address where the user is located, press the black location symbol. Here you can also see the battery level of the alarm unit.
Your own location is shown with a blue location dot. The icon with a house symbolizes the home address.

If you want to read the action plan designed for the user and the alarm type, drag the field upwards where it says “Action plan”. To minimize the field, drag the field down again.

To complete the notification, click “Accept”.

If you want to handle the notification yourself, click on “Handle yourself”. If the forwarding function is activated, you can also choose here to forward the alert to another alarm receiver, then click on “Forward”.

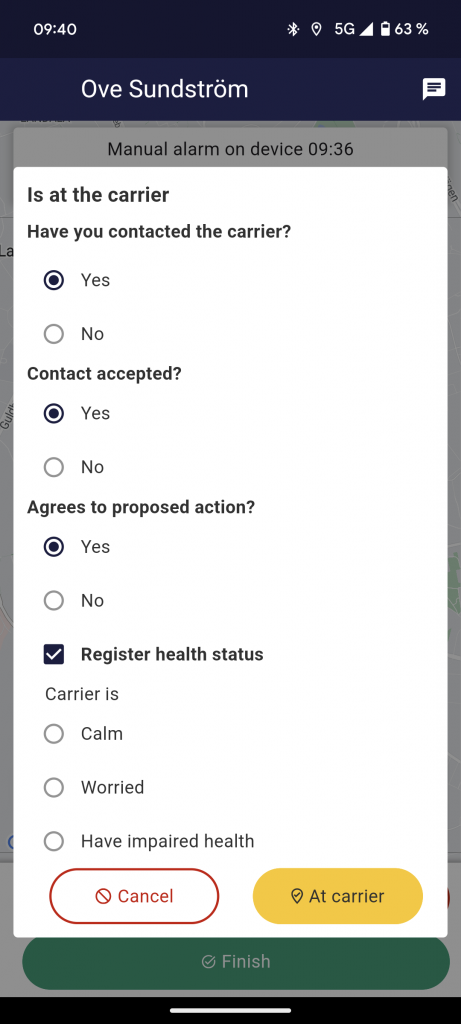
To register that you are with the user, after you have chosen to handle the notification yourself, click on ‘With the person’.

A pop-up appears where you can note whether you have contacted the person or not.

If you have contacted the person, there is additional information you can record. Finish the registration by clicking “Save”.

Finally, click “Exit” and the notification will disappear from the notification list.